Saturday, January 3, 2015

My first Lindy's Stamp Gang DT project!

Hello everybody, I'm super excited to share with you my first project as a member of the Lindy's Stamp Gang Seasonal Design Team. 
 
In line with the gorgeous colour palette for January's Challenge, I've used shades of purple along with Orange Creamsicle and Cosmopolitan Pink. 


Here's a tutorial on how I created it. 
 
Firstly, I layered lots of different die-cuts and a doily onto my canvas. 
 

I lightly marked where my photo would go.  I added some laces, buttons, and embellishments I'd made from paper clay.  Next I painted everything with white Gesso, and added flat flowers.  
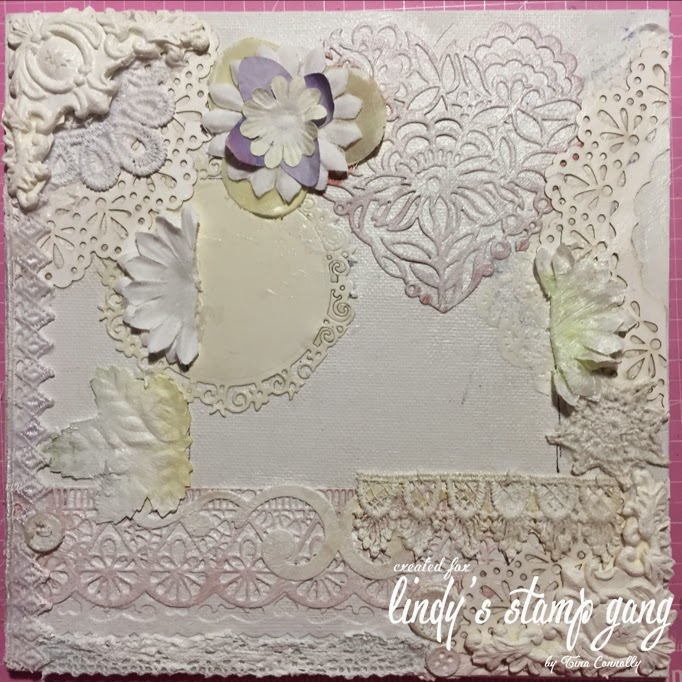
 
I sprayed a few layers of mists, building up the colours in different areas.  When you are using contrasting colours, my tip for spraying is to build the colours in separate areas first, starting with lighter tones and then build depth with the darker sprays.   Don't spray all over with one colour, then expect the contrast colour to pop.


Darker purple tones were added for depth.  I allowed my dark purples to sit in the crevices around the diecuts, the top of the diecut will resist absorbing the spray because of the gesso.

 
I stamped some leaf patterns using clear embossing ink, and embossed with Aurora Amethyst embossing powder. I also inked and embossed the highpoints of the paper clay mouldings.


My metal flowers and title was embossed with Pop Rock Purple embossing powder (which is opaque), then the "My" and the lower part of "Girls" was embossed with Aurora Amethyst (which is translucent). 
I love the effect this creates!
 

My chipboard branches were painted with Witches Potion Purple, and heat embossed once dry using Aurora Amethyst.  Cosmopolitan Pink Starburst spray was added to create a few highlights.
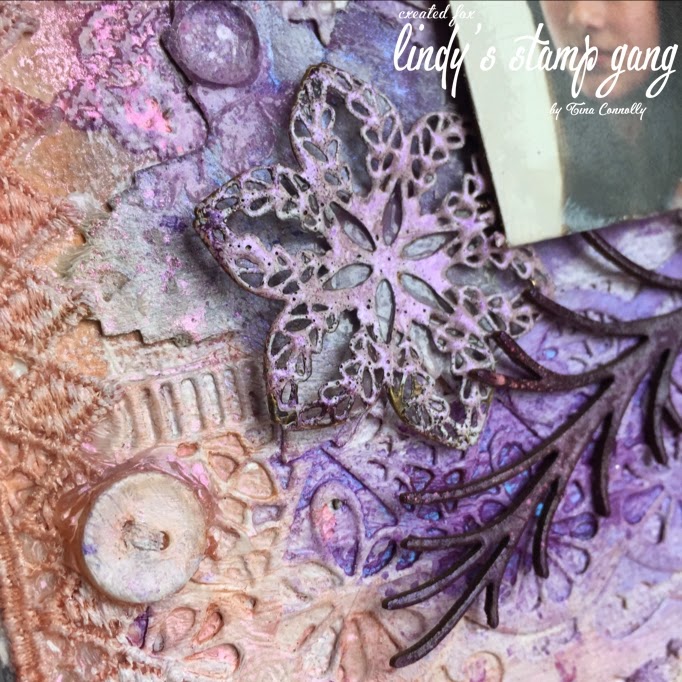
 

And here are some closeups of the finished project.


The flowers were misted with shades of purple Starburst sprays to give that beautiful shimmer.


Friday, January 2, 2015

Lindy's Stamp Gang January colour challenge

The start of a new month brings a new colour challenge at Lindy's Stamp Gang.  Here's the January colour palette, isn't it just gorgeous?


I decided to create a layered card and started with white cardstock and Cordinations Gemstone cardstock in white, which has a pearlescent finish.  This meant that any sprays used on the Gemstone cardstock became very soft and muted.

 
 I used five different Couture Creations dies which I either sprayed with Lindy's Stamp Gang Starburst & Flat Fabio sprays, or I embossed them.  I also embossed my metal elements.


I dyed some muslin using LSG Orange Creamsicle Flat Fabio spray before layering it behind my metal flower.  Both the metal pieces were embossed using Pop Rock Purple which is one of the opaque embossing powders.  I sprayed the flowers with Pop Rock Purple and Love At First Sight Lavender to give a nice two-tone effect and add some shimmer.


Lindy's Stamp Gang products:
Love at First Sight Lavender Starburst spray
Witches Potion Purple Starburst spray
Tea Pot Purple Starburst spray
Pop Rock Purple Flat Fabio spray
Orange Creamsicle Flat Fabio spray
Orange Creamsicle embossing powder
Pop Rock Purple embossing powder
Aurora Amethyst embossing powder


Couture Creations products:
CO723889 Christmas Lace Ornamental Lace die -Christmas Border
CO724005 Floral Lace Ornamental Lace die - Touch Of Love
CO723736 The Van Roe Decorative die - Celebrate
CO723242 Madeline Ornamental Lace die- Mirror Mirror
CO723311 The Treasures Ornamental Lace die - Splendour


Thursday, January 1, 2015

January Challenge at Off The Rails Scrapbooking

 I'm excited to announce that I've been asked to join the Design Team at Off The Rails Scrapbooking.   
Check out the new challenge for January...


When I first saw the mood board, I must admit I thought this was going to be a tough one! 
You see,  I hardly ever use yellow on my creations, and if I do, it's only in small amounts. 

I looked through my photos and came across this one taken of my eldest daughter at Sandon River in New South Wales where we went camping. 


The layout came together quite easily, I used a sunray stencil with Wendy Vecchi Crackled Texture Paste - the first time I'd used this product (and it's super cool!) I used Faber Castell Whipped Spackle on the Harlequin stencil, and tried out some Goosebumps by Imagine Crafts too.  Using three new mediums meant I had no idea how it with react with the Lindy's Stamp Gang mists, or how it would turn out.  I couldn't be happier with the end result.


Monday, December 22, 2014

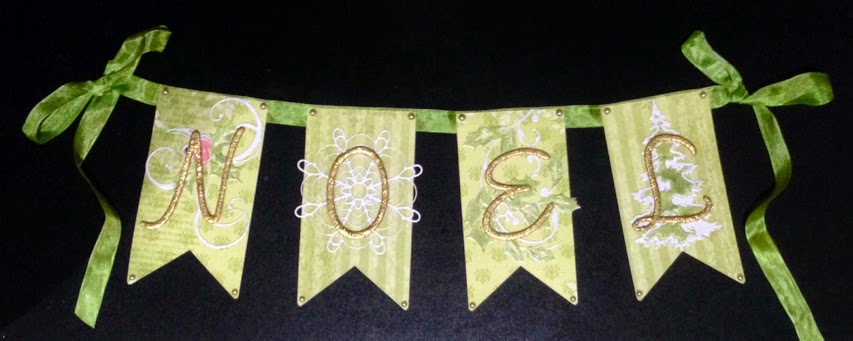
Noel Christmas Banner

 
Hi everyone, Merry Christmas and a Happy New Year to all of you. 


I've created a banner today using the Vintage Rose Garden papers, which worked beautifully for a vintage Christmas colour scheme. 
 
Here's my tutorial. 
 
 
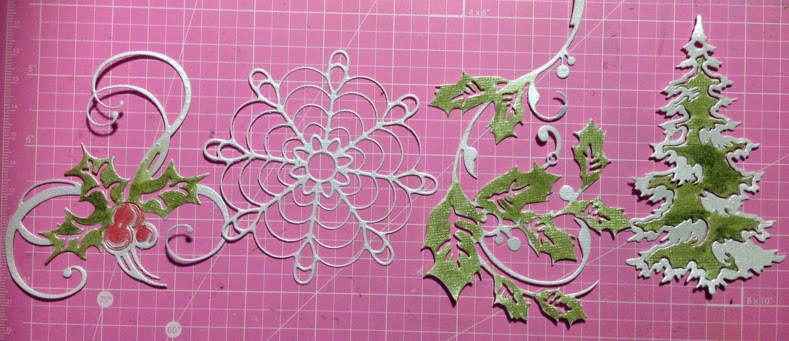
Cut one each of Holly & Berry Flourish, Christmas Lace, Holly Branch Flourish, and Christmas Fir Trees from Pearl Coredinations Gemstones cardstock.
 
 
Cut four bunting shapes from Vintage Rose Garden paper.
 
 
Accent areas of your diecuts using markers.  The Gemstones cardstock tends to soften the colours nicely.
 
 
Attach bunting pieces to seam binding using a strong glue.  Adhere diecut shapes using the new Two-Way Glue Pen, and heat embossed chipboard lettering.  Embellish with Couture Creations Pearls.


Couture Creations Products:


Wednesday, December 10, 2014

Christmas Wreath Tutorial

Hi everyone,
I've created a special wreath to decorate my home for Christmas this year, and wanted to share this tutorial with you.

Wrap a styrofoam wreath with fabric of your choice. (I cut strips of organza approximately 7cm wide)
 
 
Cut Holly & Berry Flourish in red and green Coredinations Glittersilk cardstock and trim green die-cut and layer as shown.
 
 
Cut two of Christmas Star from white and silver Coredinations Glittersilk, and layer with the silver stars in the center.
 
 
 Adhere Holly & Berry Flourish on top.  Attach to top of wreath.
 
 
Cut Christmas Fir Trees from white and green Glittersilk cardstock  and add a little "snow" using white paint or medium.  Cut Reindeer's Sleigh from red Glittersilk.  Cut a piece of acetate and attach to back of wreath.  Adhere trees and sleigh.  Spray acetate from behind with white mist to create a snowing effect.  Allow to dry then spray with a clear coat varnish, or fixative so it won't wipe off.
 
Cut two Holly Branch Flourish and attach to bottom of wreath.  Embellish with red Gemstones. 
 
 
Cut Merry Christmas and attach to acetate.
 
Cut four Christmas Branch from green Glittersilk cardstock and bend fronds up a little to create dimension and attach.


And you are done! 
 
Here's a few more close-ups....


Couture Creations products:


Thursday, November 27, 2014

Christmas Fir Tree card

Hi everyone!
It's Tina here, with a fun Christmas card for you to make! 
I used the Christmas Fir Trees die, and cut three each of both the dies.   I cut one of the larger die in white and discarded the center piece.  I trimmed the lower layer off one of the green pieces to create a different size tree.
 
 
The white piece was layered over the large green tree and some Glitzn' Glamour added.


The smaller size trees were all cut in green, folded in half and layered to create a 3D Christmas tree effect.  I also added smears of white paint and Silver Glitzn' Glamour to create my "snow".  I also sprayed the Vintage Rose Garden paper with some white shimmer mist for a wintery effect. 
 

Tuesday, November 11, 2014

Dies and Jac paper!

Hi there everyone, it's Tina here with a little trick for using dies with Jac paper. 
 
If you are anything like me, you have a stash of products hidden away that you bought but haven't really used.  For me one of those things was Jac paper, which is basically sticky on one or both sides. 

Diecut the three largest Nesting Vintage Signs (Largest two from paper, the other from Jac paper)

 
 Layer these together.  To adhere the Jac paper, peel protective backing to expose the adhesive. 


Expose the top layer of adhesive and using the Love Abounds die as a mask, sprinkle glitter over the top, rubbing lightly to ensure it sticks securely. 


 Tap off excess glitter, remove die and cover with a contrasting coloured glitter, and repeat the process.


Attach all layers to a card base and embellish with a chipboard sentiment.


And here's another card I made using the same technique with microbeads.


Couture Creations products:
CO723290 Elegance Embossing Folder - Damask Flourish Embossing Folder


Wednesday, October 29, 2014

Sydney Papercraft Festival

Hi there, a quick post to let you know I'm off to teach in Sydney on Friday, 31st October and Saturday 1st November, at the Sydney Papercrafts Festival . 
The class is packed with heaps of tips and techniques, using Couture Creations dies, embossing folders, and the new release Vintage Rose Garden papers.  The kits are excellent value, and include a die and embossing folder for you to keep.  Book with Scrap With Friends.

Here is a sneak peak of the class....

 
I'll also be demoing on the Scrap With Friends stand so drop by and say hello.

LinkWithin

Related Posts with Thumbnails