Sunday, July 3, 2016

Dream Big


 Hi there, Thought I'd share this art journal page I created, these are so much fun, and maybe just a little addictive!  
Now I'm certainly not that experienced at this, and I spoke to a friend who said they didn't know how to create a journal page.  I think what they struggled with is they didn't have a vision of WHAT it would look like.  Guess what?  Neither did I!!!!
I just started playing with different layers of mediums.  Think about what products will absorb, or resist each other.  Use according to the effects you want to achieve, or just play and see what happens.  It's JUST paper and some mediums, so it doesn't matter if you muck it up!  No-one has to see it!  You may discover some really cool techniques along the way and the creative process is quite relaxing/therapeautic.  
I started with the Shimmer Sprays first and created some patterns, a few closeup squirts of Love Colour Spray, and some circles of smeared aqua paint, I then drew some quick circles and symbols with black paint (seriously...don't overthink this part)


Smear white gesso or a good thick white paint around the outside of your circles.


Add a bit more.... really get that contrast!


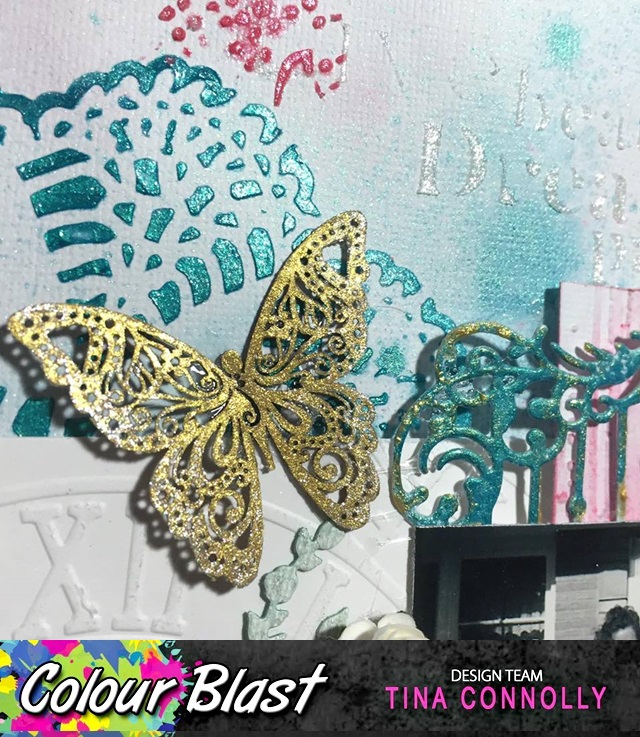
Add Bling Colour Paste through various stencils.


Using Bling and Deep Water Colours pastes, blend one into the other on various arrows , or whatever stencil you choose to use.  (Do this by putting one colour at each side, and blending in the center with your finger)  Add more pattern using Just Blue Colour Paste.


Happy scrapping,
Tina

Products used:

Saturday, July 2, 2016

Love and Peace


Hi everyone, I've been playing with another art journal page, but remember these techniques could be used on a card or layout just as easily.

I prepared my page using gesso and allowed to dry, then used Colour Spays and Shimmer Mist Sprays to created background colour and patterns.
Draw a large heart and paint outside it with opaque paints (yes, you cover some of your work!)  I used Fire Engine and Bling Colour Paste through a stencil to add patterns.
Mix various Colour Shimmer Dusts with gel medium or texture pastes and use through other stencils.
Keep adding patterns and textures, have fun!


I added Snow White Colour Paste through a bubble stencil, and drew some accents with a white journal pen.


The completed page and some close ups.  (Wish I could capture the sparkle in photos.) 


Thank for visiting,
happy scrapping,
Tina

Products used:


So she decided...to try art journaling!


Hi everyone, I thought I'd show you my art journal pages I created.  Basically I prepped my page with clear gesso (the medium you prepare your paper with will effect the depth of colours and how they absorb, or move/mix)  I stamped my girl using Stazon so it wouldn't run.
I dropped a few tiny amounts of Colour Shimmer Dust (use the end of a flower stem, or pin as your scoop,you really don't need much)
Mist with water to activate....this is the fun part, the more water you add the more the colour mixes, 
Add more Colour Shimmer Dust and misting as required.


I mixed (a very small amount) of Candy Shimmer Dust with a little gel medium and painted the feathers and poppies.
I did the same with Lush (green) and used it through a bubble stencil.  (These Shimmer Dusts can be mixed with many mediums so don't be scared to have a play.  I've used it with crackle medium, gesso, texture paste, paint, water, made my own mists.... go on, experiment!!!)
Write a favorite quote, or personal thoughts, or your goals, or whatever you like!


Add some accents using a white journal pen.


Thanks for visiting.  hope you've been inspired to play!
Happy scrapping
Tina

Products used:


Friday, June 24, 2016

Playing with colour

Hi everyone!
Had lots of fun creating this.  It started out as a plain sheet of white cardstock.  Would you like to know how I did it?


Start by positioning your photos and adhere a few pieces of white cardstock.  Put photos aside and lay a stencil over your page.  Apply texture paste with a palette knife and then while still wet, spread Colour Paste in Bling, Tangerine Dream, and Fire Engine (i found doing this part with your fingers allowed greater control and I was able to create a nice fading effect in places)


Once dry spray Shimmer Mists were sprayed and dripped.  Chipboard pieces were either sprayed or embossed, and the Kutalicious acetate 'fence' was heat embossed (love that these products can be used on so many different bases).  Something else to note is that you get different effects, dependent on the colour of the item you are embossing, how cool is that???

 Lots of layered piece for interest, I love the contrast between the subtlety of the Shimmer Spray with the intense colour and shine of the Colour Pastes.  


I added a bit of stamping using Stazon, don't you love how it turned out? 


Happy scrapping,
Tina

Products:

Wednesday, June 22, 2016

A quick vintage layout!

Hi creative people, hope you're all having a fantastic day!
Just wanted to share a quick and easy layout with you today...


Smear "Snow White" Colour Paste through a stencil and onto the exposed corrugated cardstock.  Mix some "Fire Engine" and "Snow White" Colour Pastes to create a nice pink (or use "Bubblegum")and apply through stencil.  Once dry use a doily stencil with "Deep Water" Colour Paste. 


A few spritzes of "Deep Water" Shimmer Spray, and then spray "Fire Engine" onto a baby wipe, and smear for a subtle washed effect.


Heat emboss the frame diecut and then smear some "Bling" Colour Paste in patches.  Use the "Bling" to colour a butterfly accent.  Use an embossing folder to emboss some cardstock, and apply a little Colour Paste with your finger, to highlight the raised areas.


Happy Scrapping,
Tina

Products Used:


Saturday, June 4, 2016

Another selfie!!!


Hi everyone, I'm super excited to be teaching at the Scrapbook and Papercraft Expo in Brisbane this year, and to share lots of fun techniques using the gorgeous products from Colour Blast.  Make sure you book into my class (Session 2 in Classroom 5) for a chance to win $50 of Colour Blast products!!! How cool is that?  

Make sure you stop in and say hi to the team on our stand, plus.... I'll be demoing each day at 3:00pm at the Tutor Demo Desk.


Today I'd like to share a layout created with (just some) of the "selfies" taken by my eldest daughter at her Grade 12 Formal. 


 I used black cardstock as my background and sprayed 'Tangerine Dream', 'Fire Engine', 'Deep Water', and 'Stormy Weather' through a mask.


Once dry, I smeared 'Snow White' Colour Paste through another mask (use your finger to do this, which allows you to create a very subtle pattern).  Allow to dry and add another layer, with a third mask, this time using 'Deep Water' Colour Paste.


 The chipboard pieces were painted using the Colour Pastes.  To do this just wet a brush and pick up some of the colour.  


The lace was dyed using 'Deep Water' Shimmer Spray.  Dampen the lace a little with a spray of water, which will allow the colour to wick, creating a soft, faded effect.


 The title was embossed using 'Deep Water' Embossing Powder.


And here's my completed layout....


Happy scrapping,

Tina


Colour Blast products:

Colour Blast Shimmer Spray - 'Tangerine Dream', 'Fire Engine', 'Deep Water', and 'Stormy Weather'

Colour Blast Colour Paste - 'Snow White', 'Tangerine Dream', 'Fire Engine', 'Deep Water'

Colour Blast Embossing Powder - 'Deep Water'

Wednesday, May 18, 2016

Demo day samples

Hi everyone!  I had the pleasure of demonstrating on behalf of Couture Creations and Ultimate Crafts for the Papercraft Trail.  Here are a few of the techniques I shared with the lovely ladies and gents that came along.

This card was created using texture paste through the die-cut negative as a stencil, then I sprinkled it with 'Chunky Glacier White' and 'Pastel Pink with Holographic Silver Glitters' embossing powders, and heat embossed which gave it lots of depth.  The diecut was heat embossed with 'Pastel Lilac with Holographic Silver Glitter', and layered on top.

I used the die cut from 'Crashing Waves' as a stencil, and pressed embossing ink over it, then embossed with Turquoise Super Sparkles.  I then misted over it, and attached 'Seashells' and 'Seahorse and Coral' diecuts.

These cards were created using the 'Crashing Waves' diecut as a stencil, and embossed with 'Pastel Blue with Holographic Silver Glitter'.  The 'Smile' (Smile Tag) and 'Seashells' were embossed with 'Gold Chunky Crystals'.  The card face on the bottom right was created using a tan embossing mat.

Multiple stenciling and embossing techniques were used to create this card.

On the first two cards below, the mats were created using a tan embossing mat, and embellished with 'Anchored Flourish'.  'Vine Border' was used as a stencil with mists, and then heat embossed,  The forth card was created with the tan embossing mat with 'Gentle Ocean' and 'Life Is...' dies.


Another card created using 'Seashells' and 'The Little things' dies.

Products used:
CO724526 It's A Beautiful Life Intricutz dies - The Little Things
CO724513 It's A Beautiful Life Intricutz dies -  Wedding Cake
CO724533 It's A Beautiful Life Intricutz dies -  Vine Border
Couture Creations Embossing Powders - as listed above.


LinkWithin

Related Posts with Thumbnails