#couturecreationsaus
#imaginariumdesigns
Welcome to Day 1 of the
Couture Creations & Imaginarium Designs Blog Hop!
We’re so excited to team up with Imaginarium Designs sharing inspiring projects created with both our products with you this week. What could be more perfect than our Embossing Folders
and Dies and Imaginarium Designs gorgeous Chipboard designs.
Each day this week we will feature our Design Team projects and over on the Imaginarium Designs Blog they will also feature their Design Team projects all created using Couture Creations and Imaginarium Designs products. So loads of inspiring projects for you to help get your creative juices flowing.
Each day this week we will feature our Design Team projects and over on the Imaginarium Designs Blog they will also feature their Design Team projects all created using Couture Creations and Imaginarium Designs products. So loads of inspiring projects for you to help get your creative juices flowing.
We will link to the tutorials on each Design Team members blogs, please show all our designers some love and leave a comment on their blog.
We’ll be giving away Two $100 prize packages filled with Couture Creations & Imaginarium Designs goodness at the end of the week, so
be sure to play along and check back on both Imaginarium Designs and Couture Creations blogs Monday 4th August 2014 to see if you’re one of
the lucky winners!
Here are the different ways you can play along with us –
Like Couture Creations on Facebook
Share this blog post on your Facebook wall and tell us you did on our Facebook page
Follow our Couture Creations Blog
Follow Couture Creations on Instagram
Hop over to
the Imaginarium Designs Blog and see what their Design Team has created using
their Chipboard and our Couture Creations products! They also have a giveaway,
so what are you waiting for – hop over! oh and don't forget to follow our Design Team Blogs
The layout I created....
The layout I created....
Here is my tutorial...
Emboss Core'dinations cardstock as normal, then (leaving cardstock in the Velvet Tealights embossing folder) ink the raised design on the folder using a die-based ink. Close folder and run it through your die-cutting machine again. The ink will have transferred to the cardstock. Sand the raise areas with a sanding block.
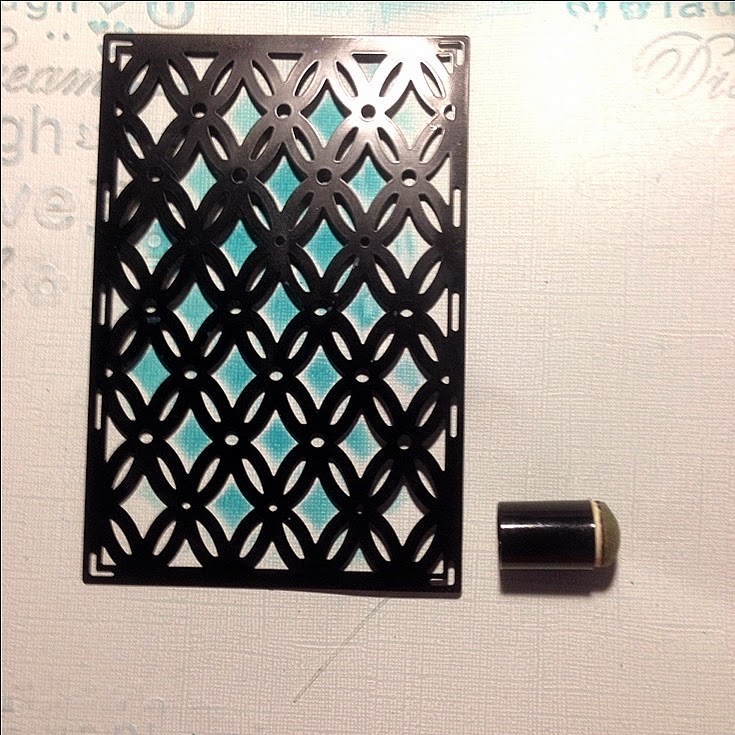
Using the Tied Together die as a stencil, ink the pattern onto the Coredinations Whitewash cardstock. Emboss the corner of the layout using Classics embossing folder and sand to reveal the core colour.
Here's some close-ups of my completed layout.
I cut Tied Together and Mirror Mirror Ornamental Lace dies to use for layering.
I de-bossed the Peacock Fans pattern onto the Imaginarium Designs Butterfly Border (which I cut up) before heat embossing.
I heat embossed the Imaginarium Designs "You Inspire Me" title and hearts.
I love this new release "Roses" Intricutz die,
Thanks for visiting my blog today.
Make sure you go visit Couture Creations designer Jo Piccirilli
Don't forget to share the love


.jpg)


Such a stunning layout Tina! Awesome techniques! & Love that color scheme too! Fabulous creating!!! :)
ReplyDeleteTina your layouts is gorgeous ...love all the techniques
ReplyDeleteloving your tutorial and the amazing project you have made, l am sure to keep popping some love elsewhere xx
ReplyDeleteBeautiful layout. Love those blues. Thanks for the great tutorial. I followed you on GFC.
ReplyDeleteGreat work mate love the bead
ReplyDeleteStunning Tina. So many techniques to admire. Love the colour pallettte too
ReplyDeleteAwesome! - I love it!
ReplyDeleteLoving all the textures and colours, great page :)
ReplyDeleteFabulous use of embossing, sanding, chipboard and textures. Love this effect.
ReplyDeleteGorgeous layout! I really
ReplyDeletelike the techniques you
used and the colors.
Carla from Utah
Love the Artsy feel of your page...well done with kicking off this Blog-hop!!!
ReplyDeleteLovely Work
ReplyDeleteyou're so clever Tina, no doubt at all - just fantastic.
ReplyDelete