Wednesday, August 7, 2013

Up for a challenge???

Are you up for a challenge?
I had to set the challenge criteria at Scrapping Outback this month so here it is....
"Use chipboard, texture, layers and masking on your project, it can be a layout, a card or OTP"

Here's my Design Team example...
I've used Lindy's Stamp gang Starburst sprays,The Crafters Workshop stencil, Viva Décor modeling paste, and the "Live, Love, Dance" chipboard is from Scrapping outback

 
Rules: After you have created a LO/card or OTP  for the challenge please upload it to your blog, online gallery or Facebook page then link and add your info into the correct Mister Linky on the right hand side of the Scrapping Outback BLOG.
Once you have done that just pop over to the SO FaceBook page and let us know you have entered our challenge - you can then link back to your own blog or FB page as well so we can all go and check out your creation.
Out of courtesy, please link your challenge entries back to the Scrapping Outback BLOG challenge or be sure to give credit to the Scrapping Outback challenge and if there is a sketch to follow please give credit to the sketch artist as well.
Please use your creation for our challenge only - it is not to be used in other challenges.
If you are winner be sure to grab your Challenge Winners Blinkie to add to your blog.Thank you.
Due Date: 31st of August 2013 11.59pm
Prize:  $15 shop voucher to spend in the Scrapping Outback store for the winning layout chosen at RANDOM by Mr Linky. 
Don't forget to check out the gorgeous examples by the rest of the DT at the  Scrapping Outback BLOG.

Monday, August 5, 2013

It's a Rainbow Blog Hop!

Rainbows, a wonder of nature with many meanings in many different cultures. They inspire us and we wanted to share some of that inspiration with our fellow crafters and anyone else who chances to look through the raindrops. You should have arrived here from http://jamilolatalula.blogspot.com .

There is a pot of gold at the end of this rainbow! There are ...two sets of rainbow blog candy for today's hop. The first requirement is to comment on each post along the hop.

Pinque Peacock is giving away a set of rainbow colored fabric covered buttons, pop on over to their facebook page (https://www.facebook.com/PinquePeacock) and give them a like, then head over to their blog (http://pinquepeacock.blogspot.com/) and follow them!

The second set of blog candy is a set of sunflower pearls, from Miriam's Crafting Supplies, one in each of the 6 colors of the rainbow! Just follow their blog (www.miriamscraftingblog.com) by clicking of the RSS feed link in the top right and like them on Facebook (https://www.facebook.com/MiriamsCraftingSupplies).

Here's my rainbow project.....


 I used Lindy's Stamp Gang Starbursts to create these fab colours. It's so pretty and shimmery in real life.  I added some drips of Extreme Glitter to add extra sparkle.

 
I had to show you this layout of my daughter and one of our"adopted" daughters with their rainbow painted faces.  I used Crafter's Workshop stencils and Lindy's Stamp Gang sprays.


Thanks for joining us along the rainbow today... I'm the last stop on the Blog Hop.    If You've only just found us, follow the ray of sunshine to the other blogs...

Full Lineup:

Miriam ~ http://www.miriamscraftingblog.com
Rhonda ~ http://www.flowersbyrhonda.blogspot.com
Amanda ~ http://salnclts76.blogspot.com
Jearise ~ http://lorbysworld.blogspot.com
Edwina ~ http://edwinascreations.blogspot.com
Anita ~ http://www.anitaandbugs.blogspot.com
JamiLola Talula ~ http://jamilolatalula.blogspot.com
Tina ~ http://scrapdiva-tina.blogspot.com

Saturday, August 3, 2013

I was featured at LSG!!!

How exciting... my easel was featured on the Lindy's Stamp Gang blog. 

Make sure you check out their blog and see the other beautiful creations.

 I realized I hadn't shared my easel here yet (it's in the Twiddleybitz Gallery along with lots of my other Design Team creations). So here is is...

 I painted the easel white and attached Pink Paislee Parisian Anthology paper in the centre.  I used Martha Stewart punches around the edges of the paper  which has an embossed resist pattern.    I stamped over the easel then sprayed with lots of gorgeous Lindy's Stamp Gang Starburst sprays. I spritzed most of my flowers too, to get that beautiful shimmer.


Some of the colours I used were Sea Mint Green, My Mojito Green, Mountain Lavender Gold, A Bit o' Bubbly, Blue Hawaiian Blue, Delphinium Turquoise, and Tiffanylou Blue.


I embossed with Lindy's Cosmic Blue Violet on the bike frame and Spanish Moss Green on the lamp post


The easel is approximately 16inches wide by 18 inches tall.   I love how it turned out, and use it to display my 12x12 layouts.


Twiddleybitz products used:
Gar006 Lamp Post and Bike with Flower Basket
Easel 12x12 (show special)
Bird and nest - show specials

Here are a few of my newest projects I've been working on.

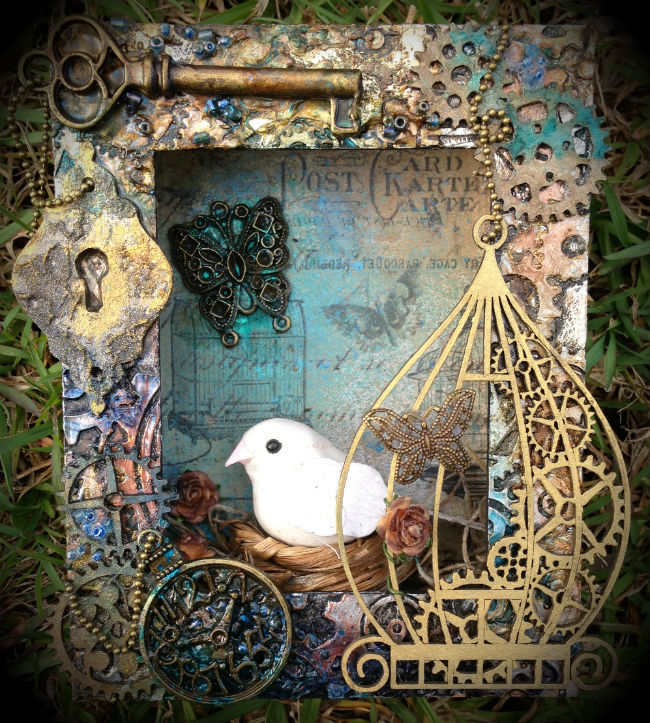
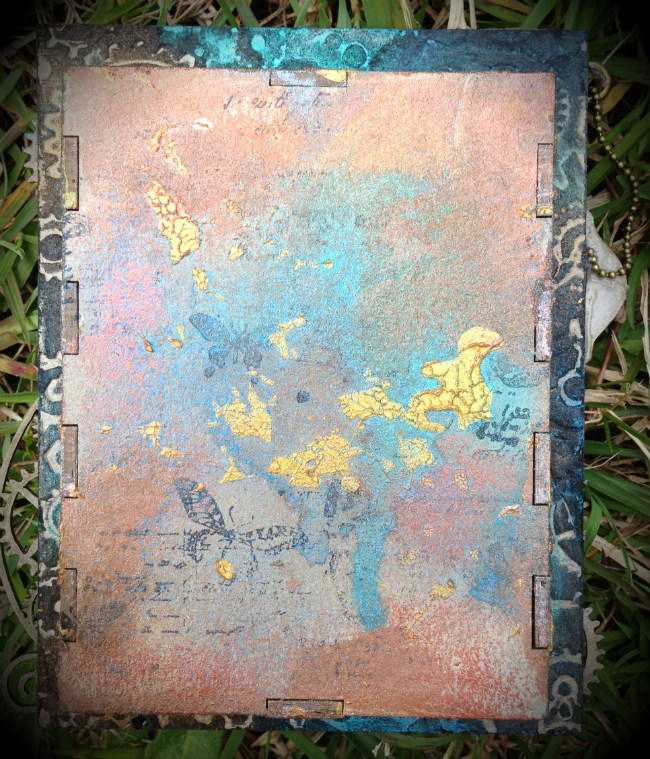
My steampunk shadowbox...


This has tons of Lindy's Stamp Gang and Viva Décor products on it, so lots of shimmer and texture. The chipboard, charms, bird and bird nest are all from Twiddleybitz.


Twiddleybitz products used:
SBS001 - Small shadowbox
VTG002 - Chippy key lock plates
SPK022 - Birdcage
TWBT11 - Tweeny cogs
TEM016 - Cog template
TT041 - Natural dried moss
Key
TT010 - Butterfly charms
TT023 - Butterfly charms
Bird
Nest

Sneak Peaks!!!
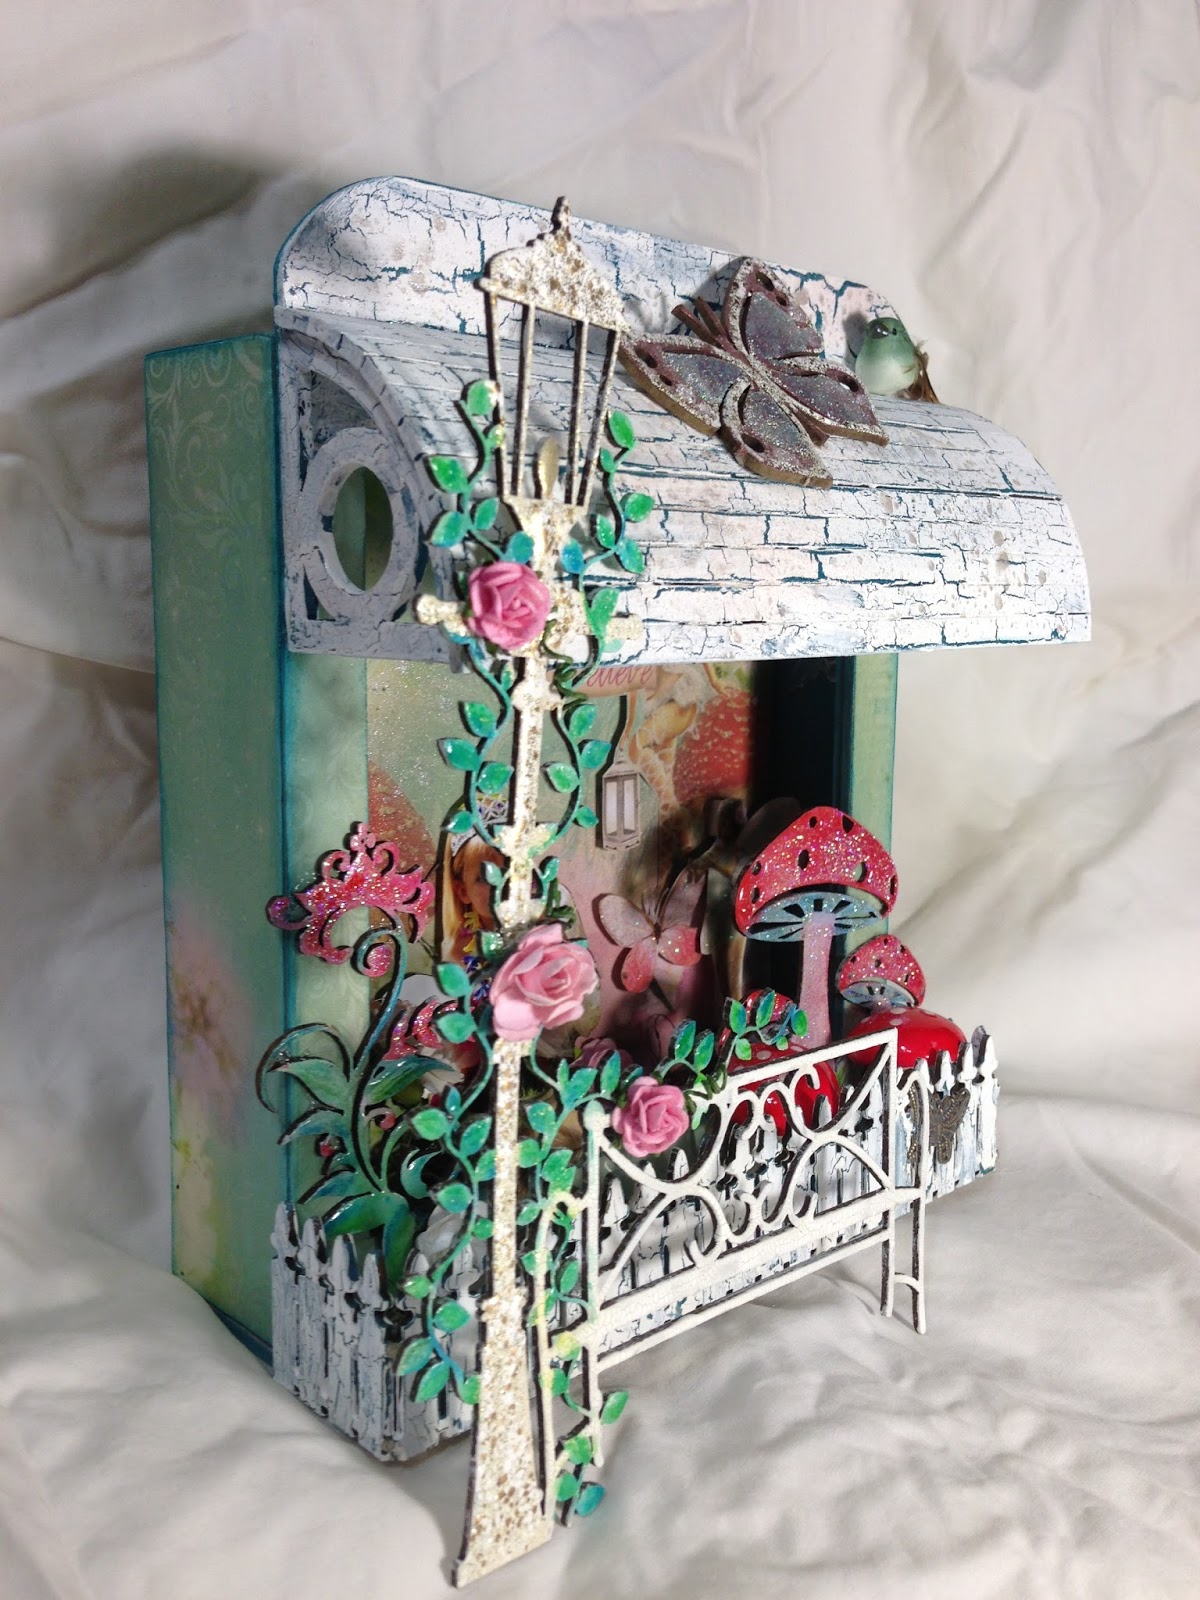
A quick peak at my Fairy Garden" shadow box which will be displayed at the WA Craft and Wood Show this weekend. 
 
 
And a sneak peak of my canvas using lots of Twiddleybitz, gesso, and Lindy's Stamp Gang products.  The full post of these two projects will be up in a few days, so make sure you come back and visit!


And make sure you come back on the 5th for this blog hop.


I hope I've inspired you to make something pretty this weekend. 
Happy scrapping,
Tina
 

Thursday, August 1, 2013

Lindy's Stamp Gang colour challenge!


One of my favorite manufacturers, Lindy's Stamp Gang is hosting a color challenge!  I love an excuse to use lots of my favorite products!   Lindy's is also having a Design Team Call (how exciting), so would like to submit this layout as part of my application.

These were the gorgeous colors for the challenge....


And here's my layout...


I started with two sheet of plain white cardstock and built up my layers of lace, gesso, washi tape, & doilies. I sprayed  Scintillating Silver Glitz Spritz to add heaps of white shimmer to my paper.  I added color with Tiffanylou Blue , Bachelor Button Blue  and Afternoon Delight Denim Starburst sprays.


I painted my Twiddleybitz chipboard pieces with gesso, and white acrylic paint, then sprayed them with Scintillating Silver Glitz Spritz.  Once dry I stamped with VersaMark and embossed with Morning Glory Azure Embossing Powder.  The beauty of these embossing powders is they are translucent so are affected by the color you emboss on.  I achieved a soft dreamy effect over a white base, but if I had stamped with a darker ink it would have been a stronger contrast. 
 
I die-cut a butterfly from white cardstock and painted it using  Rhododendron Red Rose Starburst.  I then embossed it with Terra Cotta Rust Embossing Powder whish really enhanced the color.

(Love those embossed butterflies)


The Twiddleybitz chipboard leaves were left raw (no gesso undercoat) and painted with Afternoon Delight Denim Starburst Color Shot.  Just one coat, and I got this amazing depth of color and shimmer.


The large leaves were painted with Afternoon Delight Denim Starburst Color Shot, and then sprayed with Tiffanylou Blue Starburst.  (My hands are also that color at the moment!)


Twiddleybitz products used:

FER004 - Fern leaves assorted
WIR002 - Chicken Mesh Wire
BAN003 - Banner Small
BAN001 - Banner (triangle)
FAIR005 - Fairy Blossoms Large
TWBT11 - Tweeny Cogs
FER001 - Fern Leaves set of 4
SPK002 - Flying Butterfly Clock (Steam punk)
TEM006 -Chicken wire stencil

Thank you for visiting my blog, I hope I've inspired you to get messy with Lindy's Stamp Gang, and play with some Twiddleybitz.

A Mixed Media Colour Challenge!


I found this blog a few days ago, and thought I'd join in their challenge.  Part of the requirements was to  use Red, Brown and Neutral as your MAIN colors.  Being a mixed media challenge we also need to COMBINE at least TWO types of MEDIUMS (ie: paints, markers, pastes, mists, inks, etc...)

This is my creation....


I used  embossed Core'dinations cardstock layered over 7 Dots Studio paper. 
I altered my cardstock Distress Inks, stamped with bubble-wrap using paint, and applied Viva Decor Ferro and Crocco through some Prima stencils.  This resulted in lots of gorgeous textures on my paper.  I kept my embellishments to a minimum, just using some simple tags and  a title to complete my layout.


And another layout to share, which uses Twiddleybitz chipboard, Core'dinations cardstock,  and 7 Dots Studio papers.  I just knew this paper would be perfect for these sunset photos I took just before a big storm hit last year.  Once again, I kept the embellishment fairly simple to allow the photos to be showcased.

Sunday, July 21, 2013

Back from publication!

 I thought I'd share some pages with you that were published in the March and April 2013 issues of Scrapbook News and Review magazine.


 My first attempt at Inchies.... I think they're quite fun, but need to work out where/how to use them.
 
Another layout using Lindy's Stamp Gang Starburst mists and Ranger Distress inks.
 

 And another attempt at inchies... Think I'll use these on a page about our 4Wheel Driving weekend.
 
 I'll be having fun teaching this class at Greenbank Scrapbook Shop on Saturday.  I'll show you how to alter your papers using Lindy's Stamp Gang and Ranger products.  There are still places available so give Lisa a call to book in for the class.


And I'll just let you know about the two newest classes at The Art Studio.  I've taken a few classes there and have loved them all.
 
Thanks for visiting my blog.
Happy scrapping,
Tina

Tuesday, July 9, 2013

Getting inky!

Hi everyone,
I'm back again with a layout using Twiddleybitz and My2Angels products that I'd like to share with you. 


I had lots of fun creating this.  Would you believe the main paper started life as a piece of plain white cardstock?  Yes, it's true!  
I layered various washi tapes onto my paper both vertically and horizontally in a random manner.  


I pulled out my Tim Holtz Distress Inks and began shading with a variety of colours to match my backing sheet.  I've used Chipped Sapphire, Peacock Feathers,  Barn Door, Salty Ocean,  and Mowed Lawn.  The best way to apply the colour is with a Inkssentials Blending Tool used in a circular motion.  


(Tracy tells me that all distress inks OOS will be back in store mid next week along with LOTS of new goodies)
 
I sprayed some Glimmer Mist Wheat Beer to add some golden yellow to the page.


Scrapbooking Mixed Media


Using my Twiddleybitz Chicken Wire stencil and sponged Gesso through it to create extra depth. 

Scrapbooking Mixed Media


 Of course I had to use some my2angels flowers on the page. 
 I coloured them with Glimmer Mist before attaching to my page.  


I've tucked an Antique Bronze Round Floral Flower Filigree under a Twiddleybitz Tweeny Chipboard Cog.  These cogs are my must have, go-to product at the moment.  I use them on so many projects, both feminine and masculine, and have even used them as flower centres on an ultra girly page.  

Scrapbooking Mixed Media


 My journaling was from a prompt which included " I drive, I go, I talk....".  It gives a quick and easy insight to my life right now and some of the things I do.


Scrapbooking Mixed Media


I hope I've inspired you to get inky and have fun playing with your products.  Remember, don't be afraid to alter your papers and embellishments to suit your page. 


Happy scrapping,
Tina

Monday, July 8, 2013

A new challenge at Scrapping Outback

Hi everybody!
We've got a challenge....well two really, at Scrapping Outback!  One for scrapbookers and another for cardmakers using this lovely colour palette.

And here is my inspiration piece...


You can find all the finer details here

Wednesday, June 19, 2013

And the winner is...

I hope you all enjoyed our Blog Hop and learned some fabulous new techniques! 

Well the prize winners have been drawn and the winner of my giveaway is.....Kerryn F!

Congratulations Kerryn.  Please contact me with your address details on either Facebook or connolly_tina@yahoo.com.au so I can send out your prize.  Don't forget to check the Scrapping Outback blog and the other DT girls blogs for the winners of their giveaways. 

And don't forget of the extra chance to win a prize, we have a mini challenge.

Use one chipboard technique (or more J) on a project for your chance to win a prize, all you have to do is link your project (it can be anything card, tag, layout etc.) to Mister Linky in the sidebar on Scrapping Outback blog. Make sure you give credit to Scrapping Outback! You have one week to complete this challenge,

it is due Sunday 23rd of June 2013 11.59pm (Australian Time).

Friday, June 14, 2013

Scrapping Outback Blog Hop


Welcome to the

“Chime In With Chipboard” Blog Hop!


If you arrived here from Joanne’s blog


You are on the right track! You are now at Tina’s blog!

I have a special giveaway on my blog so make sure you read all the way to the end. 


We are hopping from blog to blog to learn all about chipboard and to get inspired with awesome tutorials and layouts loaded with chippies!


So let’s start with a tutorial:


 I used the gorgeous Twiddleybitz Christmas Flourish and Stars chipboard for my layout.  And even though it's not a Christmas layout the chipboard still suits my page.

Instructions for altering chipboard.

1.  Cut your chipboard as required. 
2.  Sponge Gesso over the chipboard to create texture and provide a white surface so your colours are bright and clean.
3.  Paint chipboard with a pearlescent paint such as Perfect Pearls or iridescent medium.
4.  Decorate with rhinestones and pearls. 

5.  Add different glitters to various areas of the chipboard.  I used Glass Glitter on the baubles and a fine glitter on the flourishes.

6.  Cover the fine glitter with Dimensional Magic, this will really make your glitter pop, and enhance the sparkle.


Our fabulous sponsors are donating beautiful prize packs!


Scrapping Outback is also giving away one goodies package to one lucky winner chosen from those who survived the hop.


All you have to do is become a follower of the Scrapping Outback Blog and “like us”on Facebook, as well as visit each participating blog, become of follower of those blogs and leave a comment.


The blog hop order:

{Start} Scrapping Outback: http://scrapping-outback.blogspot.com.au


{Finish} Scrapping Outback: http://scrapping-outback.blogspot.com.au


When you have visited everyone return to the Scrapping Outback blog and leave us a comment letting us know how much fun you had!


If you post about this blog hop on your own blog you will be entered into the drawing twice for an extra chance to win!


There is an extra chance to win a prize, we have a mini challenge.

Use one chipboard technique (or more J) on a project for your chance to win a prize, all you have to do is link your project (it can be anything card, tag, layout etc.) to Mister Linky in the sidebar on Scrapping Outback blog. Make sure you give credit to Scrapping Outback! You have one week to complete this challenge,

it is due Sunday 23rd of June 2013 11.59pm (Australian Time).


We are sure you will be inspired by our talented design team

There is a lot to learn and there are lots of goodies to win and you won’t want to miss out! The blog hop is open to all,

prizes will be shipped to Australian residents only.

The hop will start on Friday 14th of June 2013 at 6pm & you have until Sunday 16th of June 2013 6pm to complete the hop.


The winners of the blog hop will be announced on the Scrapping Outback blog on

Tuesday 18th of June.

Be sure to check back on that day to see if you have won…


And..... another chance to win a prize!  This one's from me.....


This is the fabulous prize you could win on my blog, all you have to do is become a follower and leave me a comment!  (Postage to Australian residential address only)


LinkWithin

Related Posts with Thumbnails