Showing posts with label LSG. Show all posts

Tuesday, January 6, 2015

Creating a celebration cup!

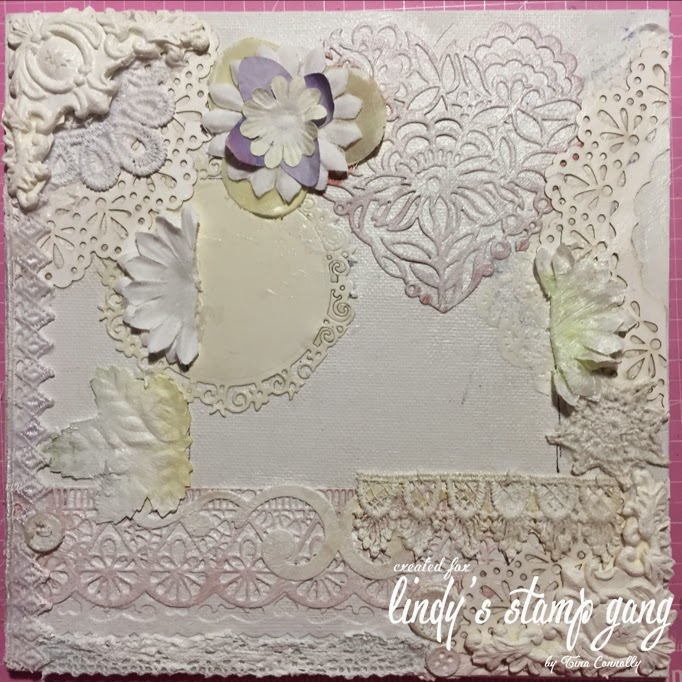
Hello everyone, it's Tina here with a celebration cup I created for a friend of mine. Some of the ones you see in the shops are very expensive, and I wanted to create something personal as a gift. 


It does need to be cleaned with care, and I suggest a very gentle washing of the outside and pat dry with a soft teatowel. 
 
Here's a tutorial on how I decorated it:
 
Mix a small amount of Magicals with Gloss Gel Medium on a palette or piece of plastic.  I only used around a tablespoon of Gel Medium to create this project. 


Mix the Magicals in well, and ensure the colour is an even consistency.


Apply coloured Gel Medium through a stencil on the lid and around the sides of the glass.  This was quite difficult and I recommend using a small stencil with a pattern that doesn't need to be "perfect".  I worked in small sections and heat dried the gel before moving onto the next section.


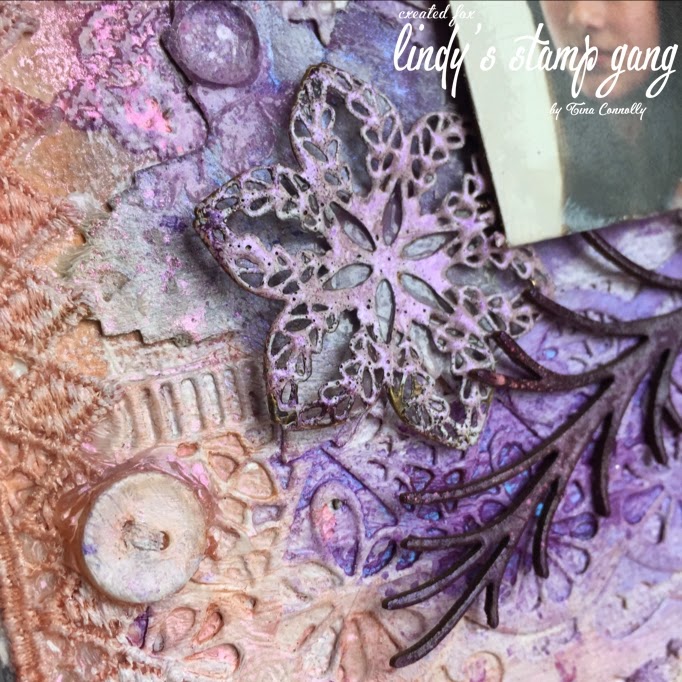
Ink metal flower with clear embossing ink.  Sprinkle Morning Glory Azure on the outer edges of the flower.


Sprinkle Aurora Amethyst in the center. and then heat emboss.


You'll have lovely colours, which blend across your flower.  Repeat this process with metal leaves and other flowers.


Ink the stem and base of the glass with clear embossing ink, sprinkle desired colours  and heat emboss. Attach metal embellishments and gold edging using gel medium and allow to dry.


Thanks for joining me today, I hope I've inspired you to go create something beautiful!
 
Lindy's Stamp Gang Products:


Saturday, January 3, 2015

My first Lindy's Stamp Gang DT project!

Hello everybody, I'm super excited to share with you my first project as a member of the Lindy's Stamp Gang Seasonal Design Team. 
 
In line with the gorgeous colour palette for January's Challenge, I've used shades of purple along with Orange Creamsicle and Cosmopolitan Pink. 


Here's a tutorial on how I created it. 
 
Firstly, I layered lots of different die-cuts and a doily onto my canvas. 
 

I lightly marked where my photo would go.  I added some laces, buttons, and embellishments I'd made from paper clay.  Next I painted everything with white Gesso, and added flat flowers.  

 
I sprayed a few layers of mists, building up the colours in different areas.  When you are using contrasting colours, my tip for spraying is to build the colours in separate areas first, starting with lighter tones and then build depth with the darker sprays.   Don't spray all over with one colour, then expect the contrast colour to pop.


Darker purple tones were added for depth.  I allowed my dark purples to sit in the crevices around the diecuts, the top of the diecut will resist absorbing the spray because of the gesso.

 
I stamped some leaf patterns using clear embossing ink, and embossed with Aurora Amethyst embossing powder. I also inked and embossed the highpoints of the paper clay mouldings.


My metal flowers and title was embossed with Pop Rock Purple embossing powder (which is opaque), then the "My" and the lower part of "Girls" was embossed with Aurora Amethyst (which is translucent). 
I love the effect this creates!
 

My chipboard branches were painted with Witches Potion Purple, and heat embossed once dry using Aurora Amethyst.  Cosmopolitan Pink Starburst spray was added to create a few highlights.
 

And here are some closeups of the finished project.


The flowers were misted with shades of purple Starburst sprays to give that beautiful shimmer.


Friday, January 2, 2015

Lindy's Stamp Gang January colour challenge

The start of a new month brings a new colour challenge at Lindy's Stamp Gang.  Here's the January colour palette, isn't it just gorgeous?


I decided to create a layered card and started with white cardstock and Cordinations Gemstone cardstock in white, which has a pearlescent finish.  This meant that any sprays used on the Gemstone cardstock became very soft and muted.

 
 I used five different Couture Creations dies which I either sprayed with Lindy's Stamp Gang Starburst & Flat Fabio sprays, or I embossed them.  I also embossed my metal elements.


I dyed some muslin using LSG Orange Creamsicle Flat Fabio spray before layering it behind my metal flower.  Both the metal pieces were embossed using Pop Rock Purple which is one of the opaque embossing powders.  I sprayed the flowers with Pop Rock Purple and Love At First Sight Lavender to give a nice two-tone effect and add some shimmer.


Lindy's Stamp Gang products:
Love at First Sight Lavender Starburst spray
Witches Potion Purple Starburst spray
Tea Pot Purple Starburst spray
Pop Rock Purple Flat Fabio spray
Orange Creamsicle Flat Fabio spray
Orange Creamsicle embossing powder
Pop Rock Purple embossing powder
Aurora Amethyst embossing powder


Couture Creations products:
CO723889 Christmas Lace Ornamental Lace die -Christmas Border
CO724005 Floral Lace Ornamental Lace die - Touch Of Love
CO723736 The Van Roe Decorative die - Celebrate
CO723242 Madeline Ornamental Lace die- Mirror Mirror
CO723311 The Treasures Ornamental Lace die - Splendour


Sunday, March 30, 2014

A colour challenge and some really cool news!


Hi everyone, my really exciting news (for those of you who haven't heard already) is that I was chosen to be part of the Couture Creations 2014 Design team.  You can follow the links to the blogs of all the talented ladies that have been chosen. 

 
Tracey Cooley (Special Projects)
Kerrie Gurney (Design Team Coordinator)


 And now I'd like to share with you my colour challenge entry for Lindy's Stamp Gang for March.


I started with two sheets of Core'dinations cardstock, and built up layers using stamps, washi tape, and various other mixed media items.

I used LSG embossing powders on the Twiddleybitz butterfly and frame, then rubbed some Inka Gold on the edges.  I used Couture Creations Glitzn'Glamour on the title to give a nice glittery effect after I'd painted it with Lindys Stamp Gang sprays.


The Lindy's Stamp Gang products I used were:
Embossing powders - Razzleberry Plum and Silver Moon Mistletoe 
Moon Shadow Mist - Tawny Turquoise

Twiddleybitz chipboard - title, oval frame, butterfly

Thanks for dropping by!
Happy scrapping, Tina

Wednesday, August 7, 2013

Up for a challenge???

Are you up for a challenge?
I had to set the challenge criteria at Scrapping Outback this month so here it is....
"Use chipboard, texture, layers and masking on your project, it can be a layout, a card or OTP"

Here's my Design Team example...
I've used Lindy's Stamp gang Starburst sprays,The Crafters Workshop stencil, Viva Décor modeling paste, and the "Live, Love, Dance" chipboard is from Scrapping outback

 
Rules: After you have created a LO/card or OTP  for the challenge please upload it to your blog, online gallery or Facebook page then link and add your info into the correct Mister Linky on the right hand side of the Scrapping Outback BLOG.
Once you have done that just pop over to the SO FaceBook page and let us know you have entered our challenge - you can then link back to your own blog or FB page as well so we can all go and check out your creation.
Out of courtesy, please link your challenge entries back to the Scrapping Outback BLOG challenge or be sure to give credit to the Scrapping Outback challenge and if there is a sketch to follow please give credit to the sketch artist as well.
Please use your creation for our challenge only - it is not to be used in other challenges.
If you are winner be sure to grab your Challenge Winners Blinkie to add to your blog.Thank you.
Due Date: 31st of August 2013 11.59pm
Prize:  $15 shop voucher to spend in the Scrapping Outback store for the winning layout chosen at RANDOM by Mr Linky. 
Don't forget to check out the gorgeous examples by the rest of the DT at the  Scrapping Outback BLOG.

LinkWithin

Related Posts with Thumbnails